Wireless iBeacon Receiver
The Wireless iBeacon Receiver can work as 4.0 receiver. It will scan the iBeacon device nearby and post to the remote server side. The device work as Wi-Fi station status. It will connect the Wi-Fi AP and connect to internet.
Specifications
- Scan multiple beacon device in same time
- MQTT protocol
- Transfer data via Wi-Fi
- The fastest transport frequency is 1 second. Good for realtime scan requirement.
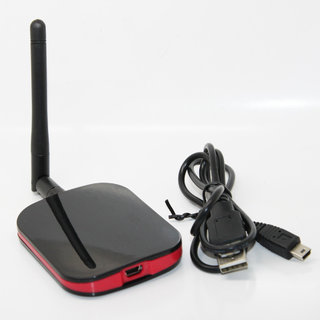
Hardware
| Parameters | Description | Remark |
| Work Voltage | 5V DC / 2A | |
| Power Interface | MINI-USB | |
| Protocol | 4.0 | |
| Receiving Sensitivity | -93dBm | High gain mode |
| Antenna | 50 Ohm | External 2dBm antenna |
| Scan Duration | Configure as 1 - 10 seconds | 1 second default |
| Wi-Fi Antenna | 50 Ohm | PCB antenna |
| Work with Wi-Fi AP | 2.4G Wi-Fi AP only | |
| Working Temperature(C) | -20 ~ 65 | |
| Dimension | 59.3mm x 75.3mm x 11.6mm |
Applications
- Indoor Location
- Meeting sign in
- Check in
- Parking & Checking in
- Sensor data collection
- Home automation
- User data collection
- ...
Quick Start
The receiver will try to connect WiFi hotspot that SSID = hello and password = 12345678 default.
- Turn on the "personal hotsport mode" for your mobile
- Change the SSID = hello and password = 12345678
- Power on the receiver
- Access the IP with browser if the receiver connected to your mobile
- Re-power the receiver. The receiver will connect a MQTT Broker provide by ApilBrother default. -
mqtt.bconimg.com - Download the free software [//mosquitto.org mosquitto] to access the beacon datas uploaded by the receiver.
Please refer the "How To Config" Section for more information.
- Quickstart - 快速上手中文版
About LED Status
- Red LED: It just mean the device is power on
- Yellow LED: It mean the device started the network module
- Green LED: It mean the network is ok and MQTT connected. You can't use WiFi Starter app to config the device at the status.
Documents
- Update Wireless iBeacon Receiver
- Known Issues
- Packet Format
- Troubleshooting and FAQ
- Wi-Fi Config
- MQTT Config