Install USB To UART Driver
If you've never connected an CP2104 device to your computer before, you may need to install drivers for the USB-to-serial converter. Download the driver this link.
Setup ESPea32 With Arduino IDE
Installing The ESP32 Core For Arduino
Espressif’s official ESP32 Arduino core is under development. It's easy to install with some command lines.
- (2016-12-5) Not everything is working yet, you can not get it through package manager, but you can give it a go and help us find bugs in the things that are implemented 😃
Instructions for Windows
Instructions for Mac
- Install latest Arduino IDE from arduino.cc
- Open Terminal and execute the following command (copy->paste and hit enter):
curl -o get-pip.py https://bootstrap.pypa.io/get-pip.py && \
sudo python get-pip.py && \
sudo pip install pyserial && \
mkdir -p ~/Documents/Arduino/hardware/espressif && \
cd ~/Documents/Arduino/hardware/espressif && \
git clone https://github.com/espressif/arduino-esp32.git esp32 && \
cd esp32/tools/ && \
python get.py
- Restart Arduino IDE
Instructions for Debian/Ubuntu Linux
- Install latest Arduino IDE from arduino.cc
- Open Terminal and execute the following command (copy->paste and hit enter):
sudo usermod -a -G dialout $USER && \
sudo apt-get install git && \
wget https://bootstrap.pypa.io/get-pip.py && \
sudo python get-pip.py && \
sudo pip install pyserial && \
mkdir -p ~/Arduino/hardware/espressif && \
cd ~/Arduino/hardware/espressif && \
git clone https://github.com/espressif/arduino-esp32.git esp32 && \
cd esp32/tools/ && \
python get.py
- Restart Arduino IDE
For more information, please check the guide at GitHub arduino-esp32
Arduino Example: Blink
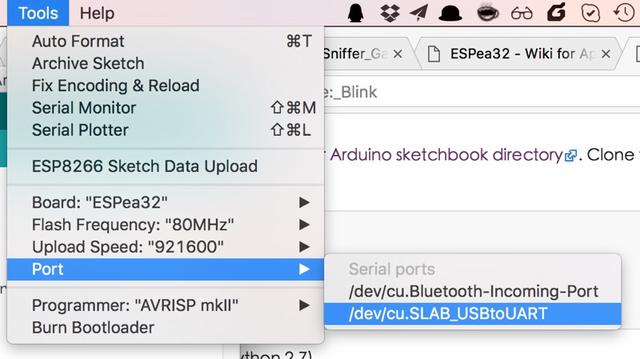
Plug the ESPea32 into your computer using a micro-B USB cable. Once the board is plugged in, it should be assigned a unique port identifier. On Windows machines, this will be something like “COM#”, on Macs it will come in the form of “/dev/tty.SLABtoUART-XXXXXX.”, and on Linux computers ti will be "/dev/ttyUSBX" or "/dev/ttyACMX".
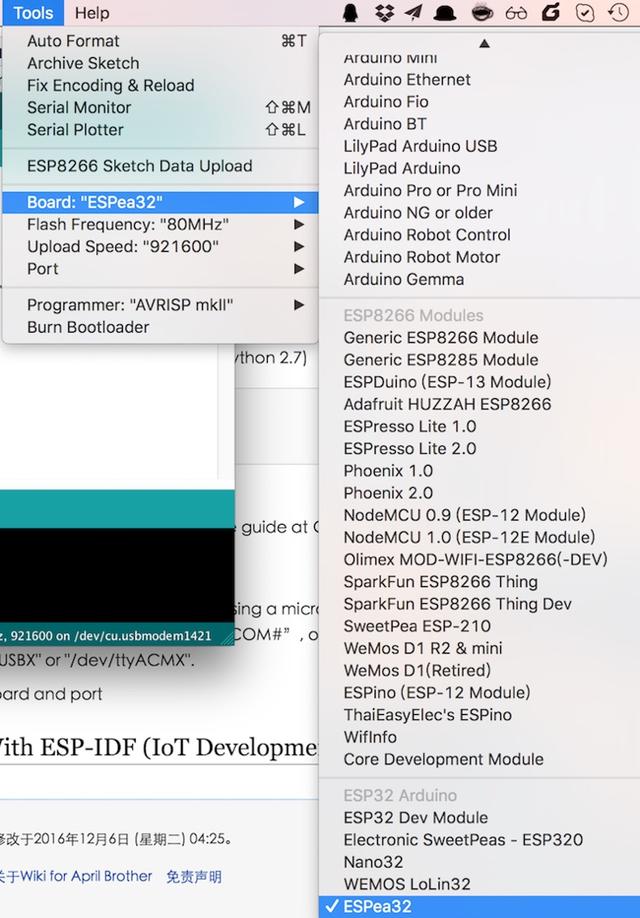
Select Board ESPea32 And Port
Choose port
Upload Sketch
Copy and paste the example sketch here, into a fresh Arduino sketch:
void setup() {
  pinMode(LED_BUILTIN, OUTPUT);     // Initialize the LED_BUILTIN pin as an output
}

// the loop function runs over and over again forever
void loop() {
  digitalWrite(LED_BUILTIN, LOW);   // Turn the LED on (Note that LOW is the voltage level
                                    // but actually the LED is on; this is because
                                    // it is acive low on the ESP-01)
  delay(1000);                      // Wait for a second
  digitalWrite(LED_BUILTIN, HIGH);  // Turn the LED off by making the voltage HIGH
  delay(2000);                      // Wait for two seconds (to demonstrate the active low LED)
}
Upload the sketch. If everything ok, you will see the LED at ESPea32 start blink
Play With ESP-IDF (IoT Development Framework)
The Espressif IoT Development Framework with the ESP32 is well documented. Please follow these guides to start
Play With PlatformIO
- Install platformio first
- Initialize with command line
pio init --board=espea32