Quick start
Step-by-step guide to configure the gateway to forward data to remote server
Prerequisites
- Prepare a power adapter 5V/2A. Please note the the current 2A is required
- Please use the USB cable shipped as power cable. Wire the cable to power adapter. Don't wire the cable to Laptop directly. It may cause weak power.
- Prepare an Android phone
- Download and install Gateway config tool📱
Configure connectivity
Connect to the gateway c3 via WiFi connectivity.
- How to connect? - The gateway c3 requires Gateway config tool📱 mobile app for connect to WiFi fist time. The app is android only right now
- Internet required? - The gateway c3 can operate on both Internet-connected and LAN networks.
Steps
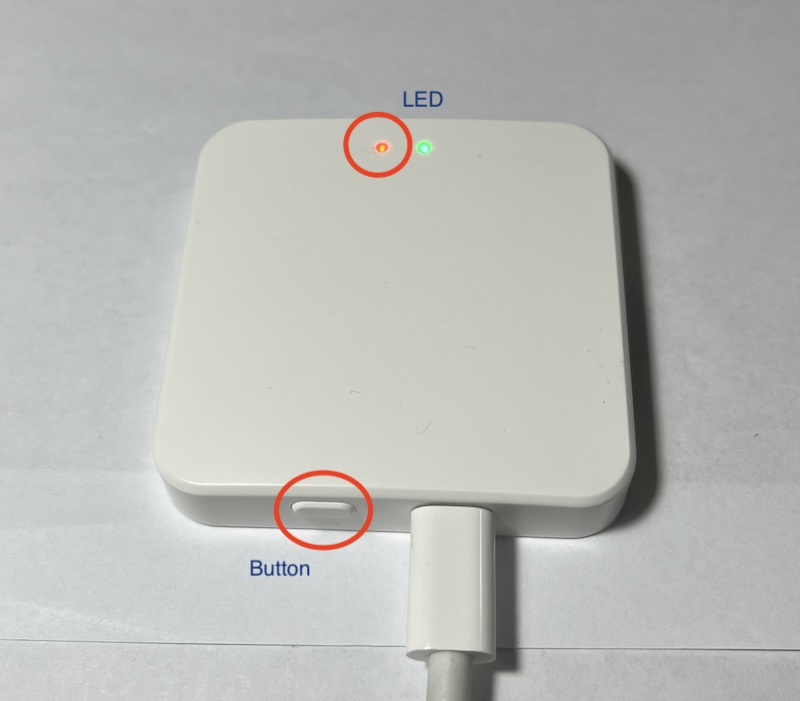
- Power on the
gateway c3and wait seconds for boot - Fast tripple click on the button. It should start blinking fast. This means the gateway enter WiFi config mode.
- Open the app and tap on "Add a gateway"
- Grant the Location permission so the app can fill the WiFi SSID your phone connected automatic
- Fill the WiFi password for current WiFi SSID
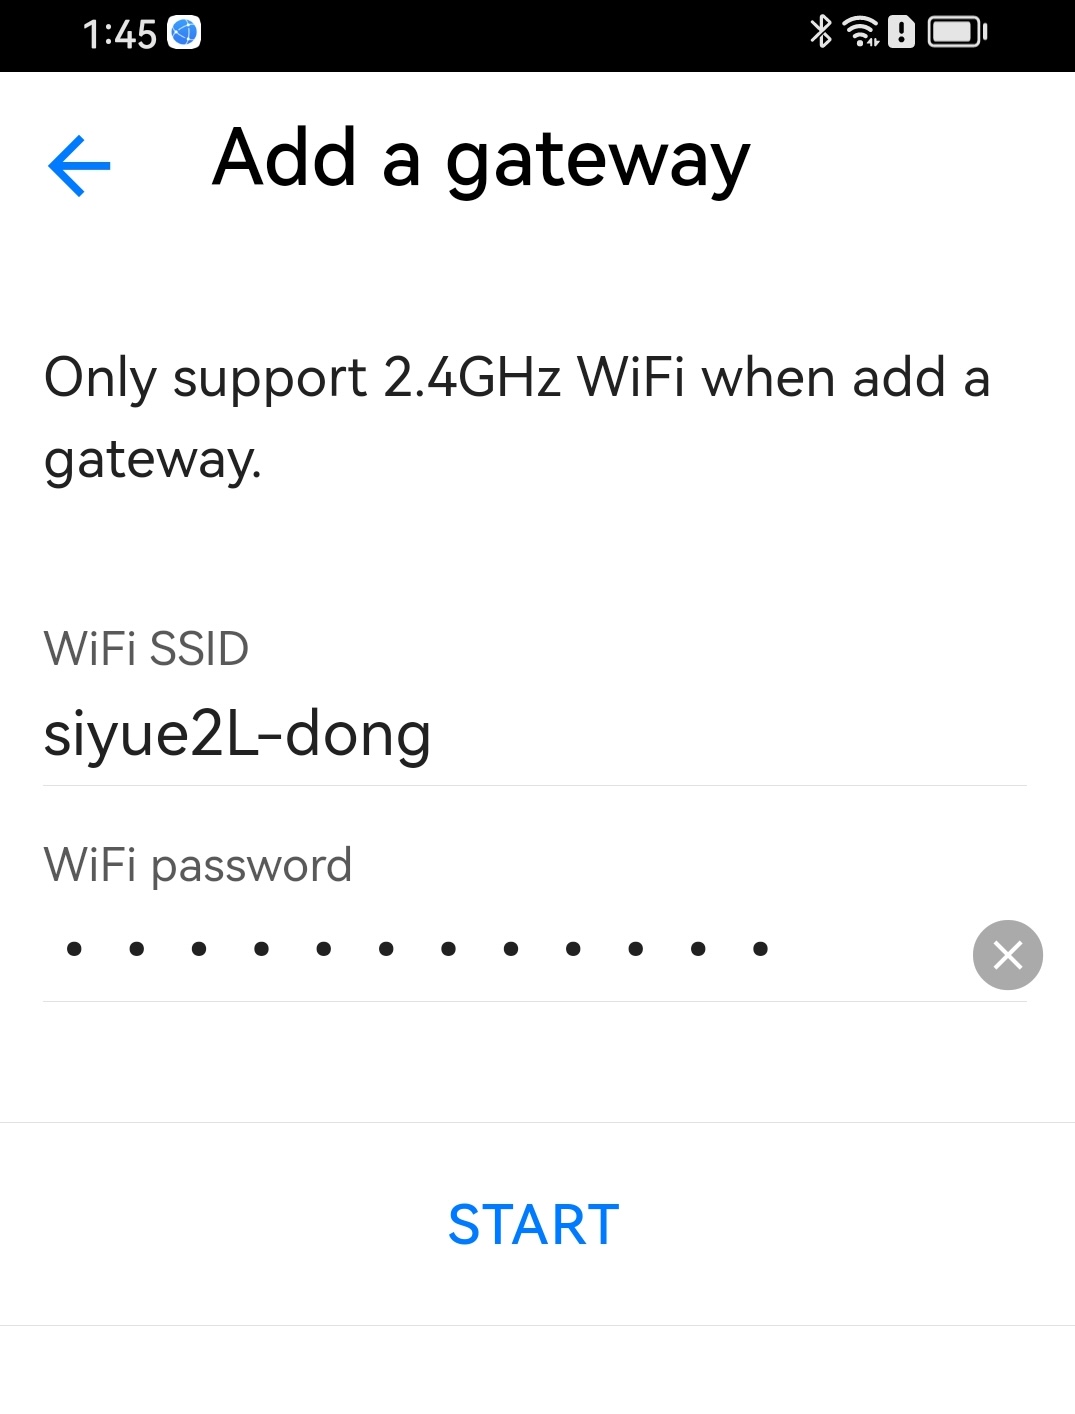
- Tap "start" button and wait minutes. It should display "Found a gateway" if successful
- Configure the gateway with the tool
How To Test
Configure data capture and forwarding
Forward data to MQTT broker
We provide testing MQTT broker mqtt.bconimg.com for your testing. Don't use it in your production environment.
- Change application settings for gateway and save
- Application Type:
MQTT Client - MQTT Host:
mqtt.bconimg.com - MQTT Port: 1883
- Publish Topic:
your-topic
- Application Type:
- Select
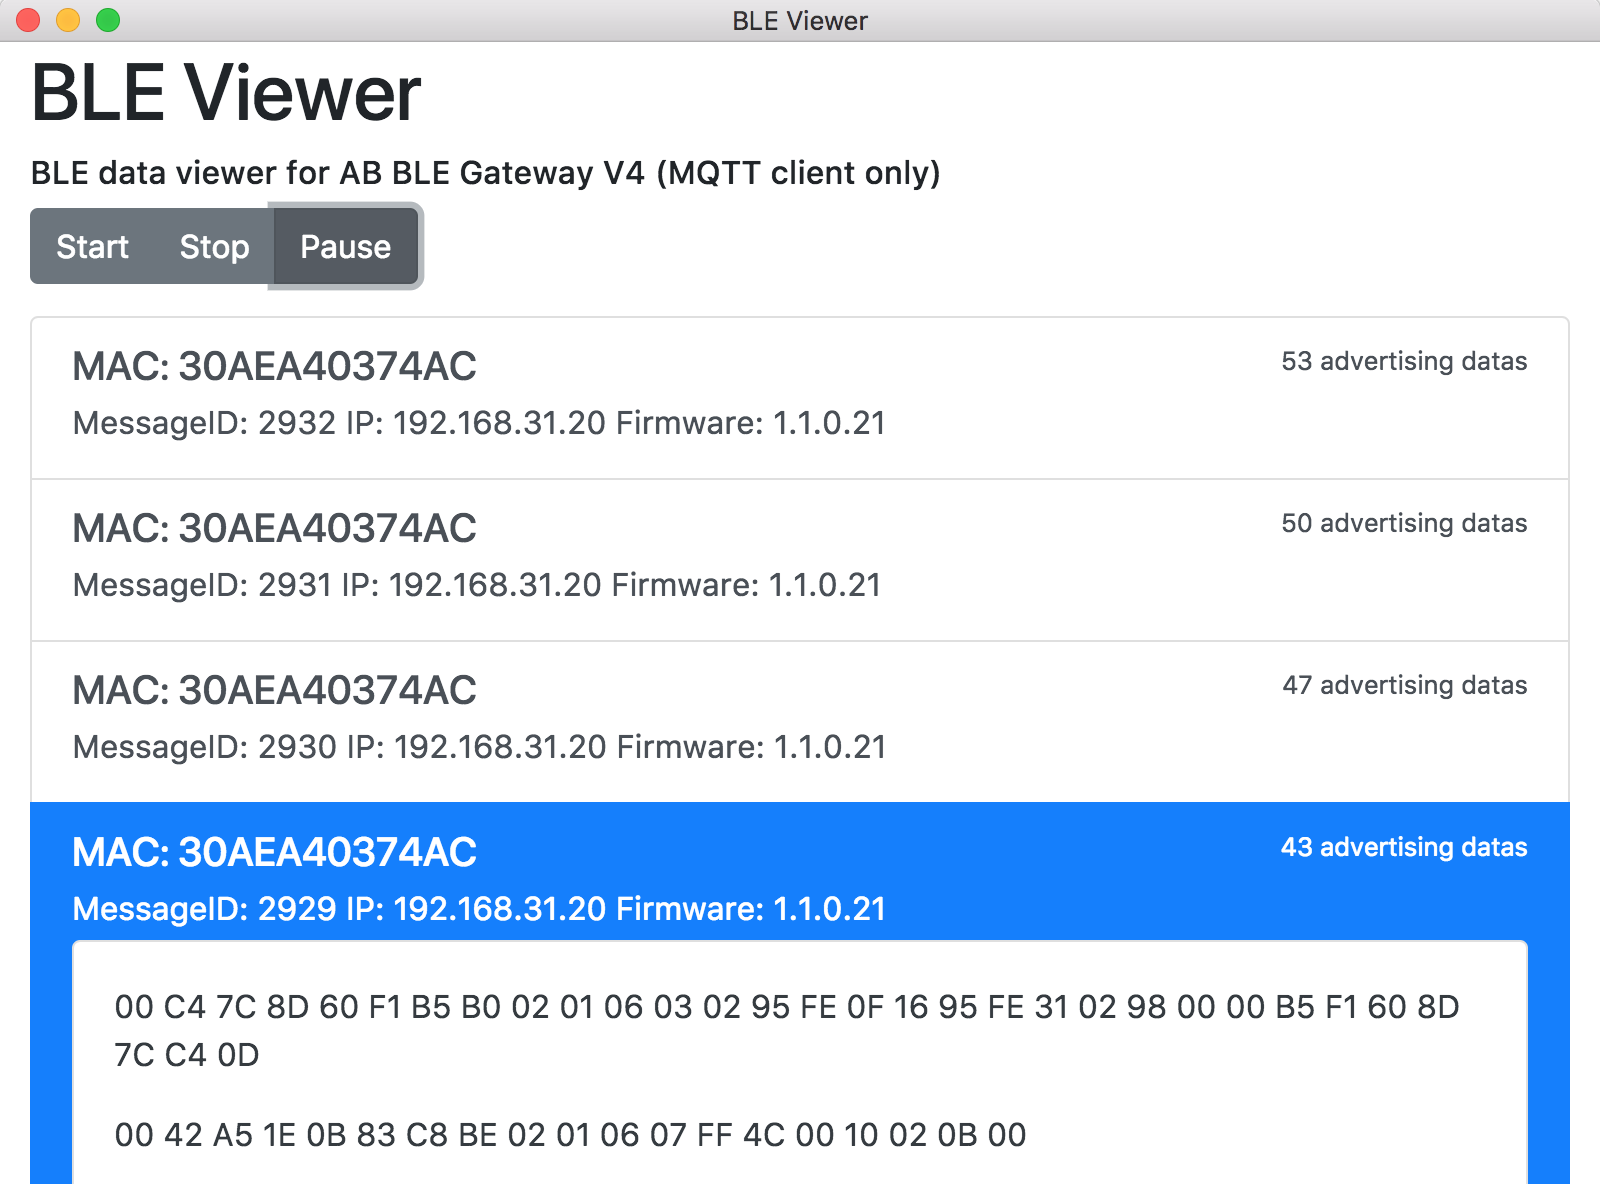
Saveto proceed - Download and install data viewer software
- Fill the form with the parameters in first steps
- View the data from gateway
Forward data to HTTP server
To quickly validate that data is correctly received on the target computer on the host network, it is possible to run gw-http-box standalone to listen for HTTP POSTs on port 8000 as follows:
- Install Node.js
- Git and console are required
- Run command in the console
git clone https://github.com/aprilbrother/gw-http-box.git
npm install
npm start
- Change application settings for gateway and save
- Application Type:
HTTP Client - HTTP Host: The IP of your laptop, e.g.
192.168.1.123 - HTTP Port: 8000
- URI:
/
- Application Type:
- Select
Saveto proceed
If the gateway is correctly configured and at least one BLE device is advertising in range, gateway data should appear in the console.